
Streamline Data Operations with Wrike and Skyvia

Exporting/Importing
File Storage
ETL


Automate data loading to and from Wrike
Replicate Wrike data to relational databases
Synchronize Wrike data with cloud apps and relational databases
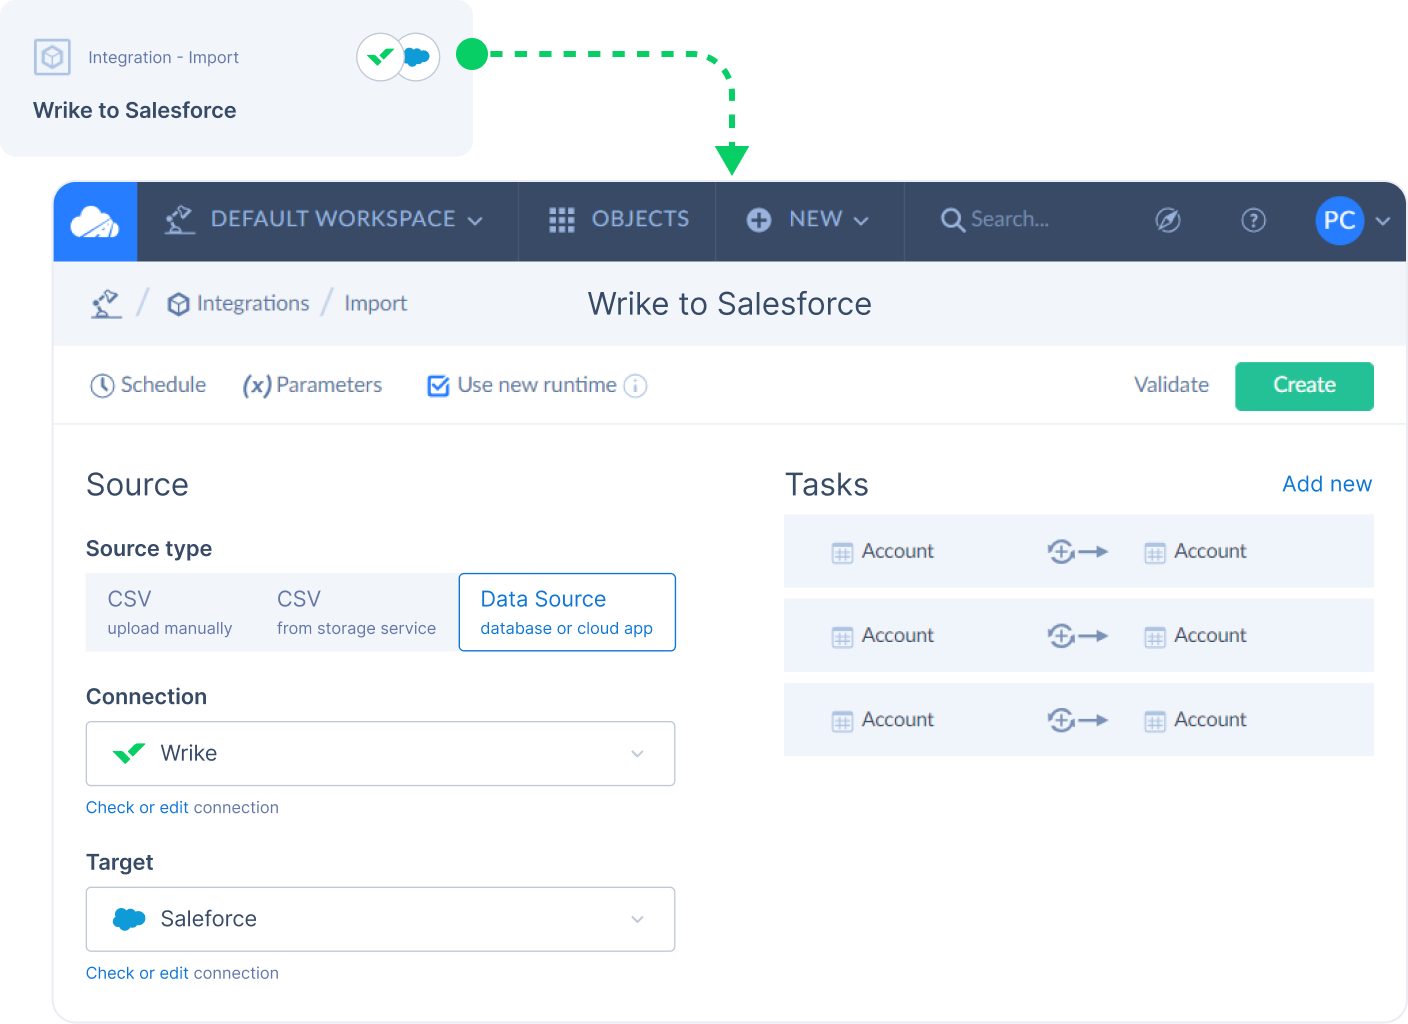
Automate data flows
The Skyvia integration is available as a paid add-on feature for Wrike Business Plan subscribers and above. You must provide credentials and be logged in to Skyvia to start using the features. The integration must also be enabled in “Admin settings” by account admins, and Enterprise admins can limit access to the integrations as required through account settings.
The Skyvia and Wrike integration will help you streamline your data operations, saving your team time they would otherwise use manually syncing, importing, and replicating data. This integration will allow your team to focus on high-level work by eliminating or automating time-consuming tasks.
You should be able to start your first project with the Skyvia and Wrike integration within minutes. Simply follow the above directions or read more in-depth instructions and start streamlining your data operations now.